How to start your acting career in Dubai UAE
Written by Mixfame.com
How to Take and Upload Pictures and Videos Like a PRO
Who doesn’t like to take photos or shoot videos of themselves? Come on, we all know you have that inner model inside you who gets unleashed and poses in front of the camera lens and the flash! The question is, are you doing it the right way? Like a pro?
As a talent, you’d want to have the best photos and videos taken of yourself as you need to market yourself properly and upload proper headshots and photos on your profile as well as self-tapes and casting videos. These elements are an essential factor in being scouted and shortlisted for any casting call. You may be surprised by the number of talents who got shortlisted by only providing professionally taken photos or online self-tapes and so many others lost their chance due to poor choice of pictures and low-resolution videos.
There are two ways to go about it. You either have or get a professional camera or simply use your mobile phone camera which, nowadays, is equipped with all the features allowing you to be a pro photographer. Also, you might ask someone to take it for you or you can just do it yourself!
Let’s assume you don’t have a pro camera or a professional photographer to do the job for you. These days, everyone has a camera on them via their phone. Smartphone cameras may not be up there with DSLRs when it comes to quality photography, but they are getting better and better and for many people; they’re the only cameras they use.
What are the tips that you should be taking into consideration when using its camera to take the best headshots and photos of yourself?
1- Capture Multiple Shots
One of the best things about smartphone photography is that you can take as many photos as you want. This makes it much easier to learn and improve your results. Keep trying until you find the right lighting and the right angle for it.
2- Keep the headshots as close as possible
Headshots might be a little bit tricky to take as the user needs to be close to the camera and try not to zoom in to avoid having that pixelized photo. It’s better to do it with the back camera instead of the front one as it has better resolution, you may use either the remote clicker if available, or just set a timer for the photo. It is preferable to have a tripod of sorts for your phone; if not, a more stable surface would suffice. Also, headshots must be taken in an area without any background elements - meaning, have a stand with a wall behind you.
3- Learn what your phone camera can do
Start by taking some time to find out exactly what your phone camera is capable of. Try the auto mode and its focus with the exposure to light. This is normally done by touching the screen where you want the focus point to be (mostly the face and eyes if it’s a full-body shot), but it’s always good to check first.
Does it have manual settings? If yes, get to know them and make sure you are using the highest resolution. Some cameras allow you to use more manual settings like white balance and shutter speed settings for light exposure. These can help you take better photos and maybe some creative ones as well.
To
provide you with some extra knowledge about the manual settings:
Shutter speed - Shutter speed is
part of the exposure of light and is the amount of time the shutter is left
open to let light pass to the camera’s sensor. In low-light conditions, you
will need a longer shutter speed, and in a sunny or bright environment, a
shorter shutter speed.
ISO value - With the ISO value, you can set the smartphone camera sensitivity to light. By increasing the number, you will be able to have more light in the photo, especially in low-light situations.
White balance - It’s a feature available on all phones. The automatic setting can create the right color temperature, but it can be off sometimes. If this is the case, you can set the color temperature yourself.
4 - Lighting makes a difference
Very few smartphones can produce excellent indoor shots due to their small sensors. It’s best to have proper lighting conditions to get better results. Lighting determines not only brightness and darkness but also mood, tone, and the atmosphere of the photo. It is recommended to use the natural light available in the room or have a light slightly directed to you with a flash on or a light ring.
5- Strike a pose with a full-body shot
Posing in front of the camera can be weird sometimes. Try this: stand or sit on a stool chair, line up your shoulder with the camera and tilt your face toward it a bit and always make sure to leave space in the frame above your head. Figure out which side you like better.
Try to look in several directions with your face by avoiding a double chin look or you may try looking at the camera by your side and putting on a serious face, smirk, or smile. Relax and have fun with it!
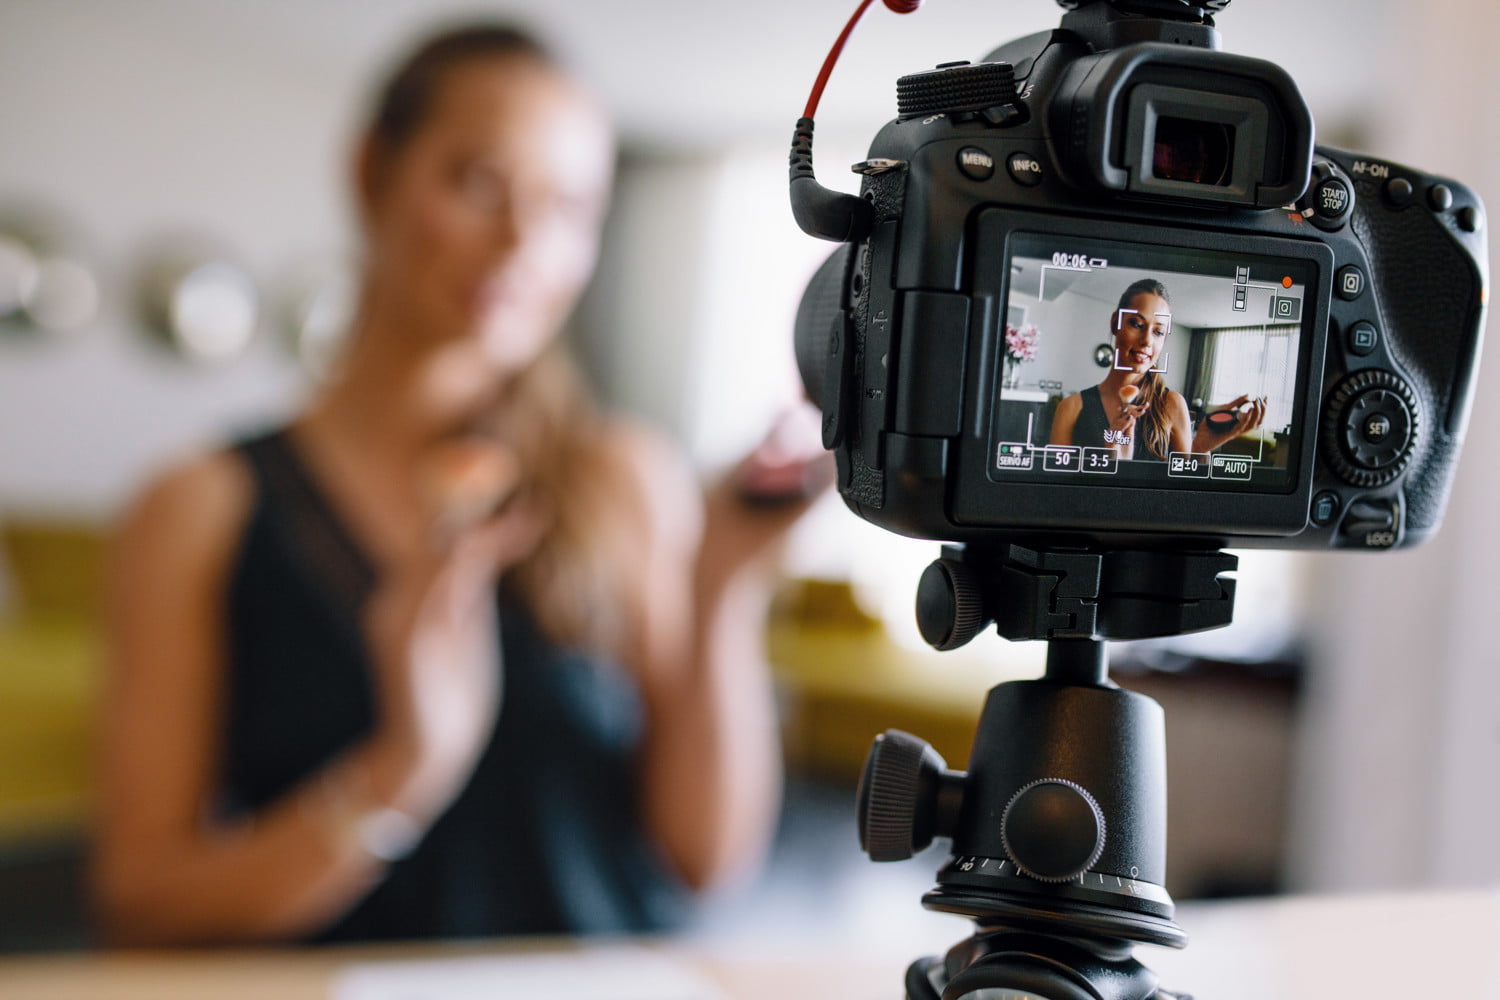
If you’re not sure what to do with your hands, try crossing your arms or placing one hand under your chin. Sure, it might feel awkward, but that’s the beauty of taking your own photo. No one is watching you, and you can delete whichever photo you don’t like.Similar to taking photos, videos are also essential to be taken properly, especially self-casting tapes. The only difference here is that you are making movements in the frame instead of just standing still. These videos will be shared with the casting directors, and they play a role in the decision-making of whether you get selected for the role, or not.
What are the tips for taking a proper casting self-tape or video of yourself?
1- Choose your ideal shooting location
While shooting a video or a self-tape of yourself, it is very important to find a location that is well-lit, whether in natural light or using a light ring as well. Also, you need to avoid any location with noise in it (AC, street, open windows, music, or people) or a big spatial location with an echo in it.
Moreover, provide a seat for yourself in that location that is stationary without any squeaks coming out of it.
2- Capture with high-quality audio
When shooting a video, the people watching it will be focusing on the sound coming out of it and trying to focus on what you are saying; hence, high-quality audio is the main characteristic. Make sure the phone microphone is capturing your voice properly and try to keep your voice at a level where it is not too low nor too high and annoying. Make sure you are not too close to the mic if it’s a separate one to avoid any distortion.
Lighting with video shooting is not so different from taking photos. You need to make sure you are in a well-lit environment either by natural light or a ring light. Try to avoid any overhead lights as they will project shadows on your face and body.
It’s you and only you in that video and someone will be watching it later. In order to show that you are a confident individual who can handle being in front of a camera, you need to own your presence.
Looking at the camera lens at all times is like keeping eye contact while having a conversation with someone. Stand or sit up straight and keep hand movement to a minimum unless needed. Show a smile and keep your shoulders relaxed.
You may also want to consider preparing what you want to say or writing notes before shooting a scripted video. Frequent pauses or tangents in your speech can make your video appear less professional. Knowing what you want to say will make things smoother. Most importantly, be yourself! Enjoy it.
For your choice of clothing, you might want to avoid colors that blend with your background. It gets confusing for the eye, and the person watching will lose focus of your face.
Also, avoid wearing any shiny fabrics or jewelry. Again, this is a video where you will be moving constantly. They might show a flare into the lens, or they might present noise in your audio.
Written by Mixfame.com
Written by Mixfame.com